Pushrod Instructions
1.
 Find the materials for the
pushrods and bend adjustment angles into half of the z-bend wires. I do these
bends with a set of rounded needle nose pliers but V shaped bends are just as
good. Following this method you will probably never need to do any adjustments
that way.
Find the materials for the
pushrods and bend adjustment angles into half of the z-bend wires. I do these
bends with a set of rounded needle nose pliers but V shaped bends are just as
good. Following this method you will probably never need to do any adjustments
that way.
2.
 Using the heat shrink tubing,
attach the adjustable wires to the 4 carbon fiber pushrods. Do not glue the
wire in place at this time.
Using the heat shrink tubing,
attach the adjustable wires to the 4 carbon fiber pushrods. Do not glue the
wire in place at this time.
3.
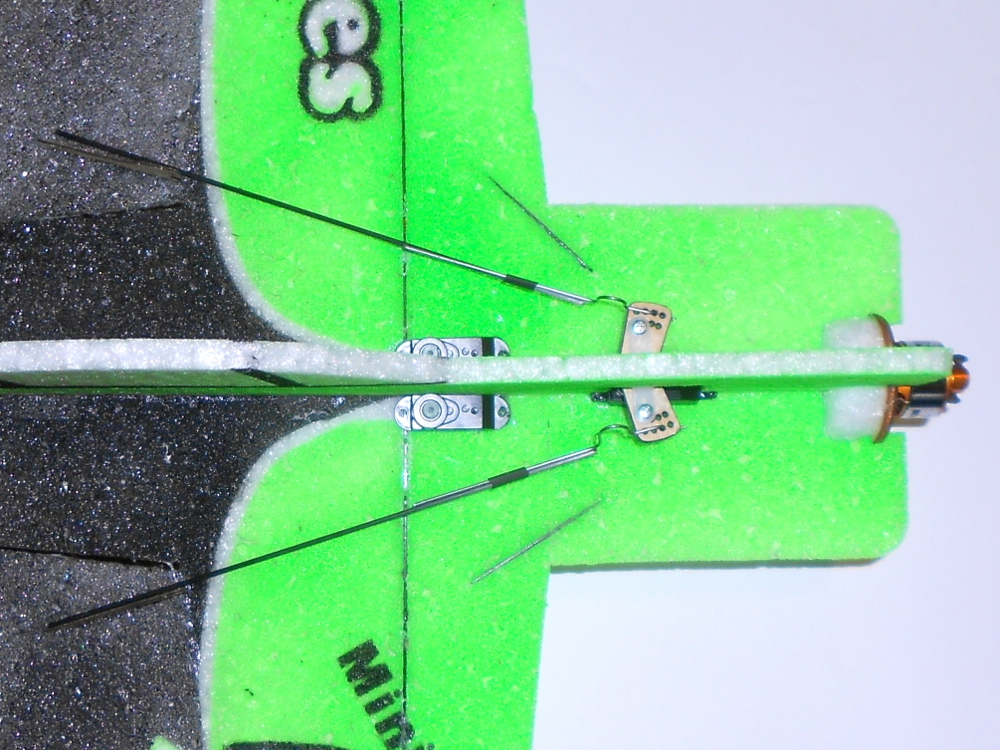 Insert the shorter pushrods into
the anti-differential bellcrank on the aileron servo. Note that the pointed
lobes on the bellcrank face forward. This bellcrank provides a perpendicular
connection from the servo pivot to the control horn giving the same up and down
throw to the ailerons. Without it the angle would cause mechanical
differential. Cut the pushrods 1/4”-1/2” back from the aileron hinge line with
the bellcrank centered.
Insert the shorter pushrods into
the anti-differential bellcrank on the aileron servo. Note that the pointed
lobes on the bellcrank face forward. This bellcrank provides a perpendicular
connection from the servo pivot to the control horn giving the same up and down
throw to the ailerons. Without it the angle would cause mechanical
differential. Cut the pushrods 1/4”-1/2” back from the aileron hinge line with
the bellcrank centered.
4.
 Remove the pushrods from the plane
and use heat shrink tubing to attach two of the remaining straight z-bend wires
to the cut ends. Do not glue the wires in place. This will allow us to do the
fine adjustments of the pushrod lengths. You should end up with pushrods that
look like this.
Remove the pushrods from the plane
and use heat shrink tubing to attach two of the remaining straight z-bend wires
to the cut ends. Do not glue the wires in place. This will allow us to do the
fine adjustments of the pushrod lengths. You should end up with pushrods that
look like this.
5.
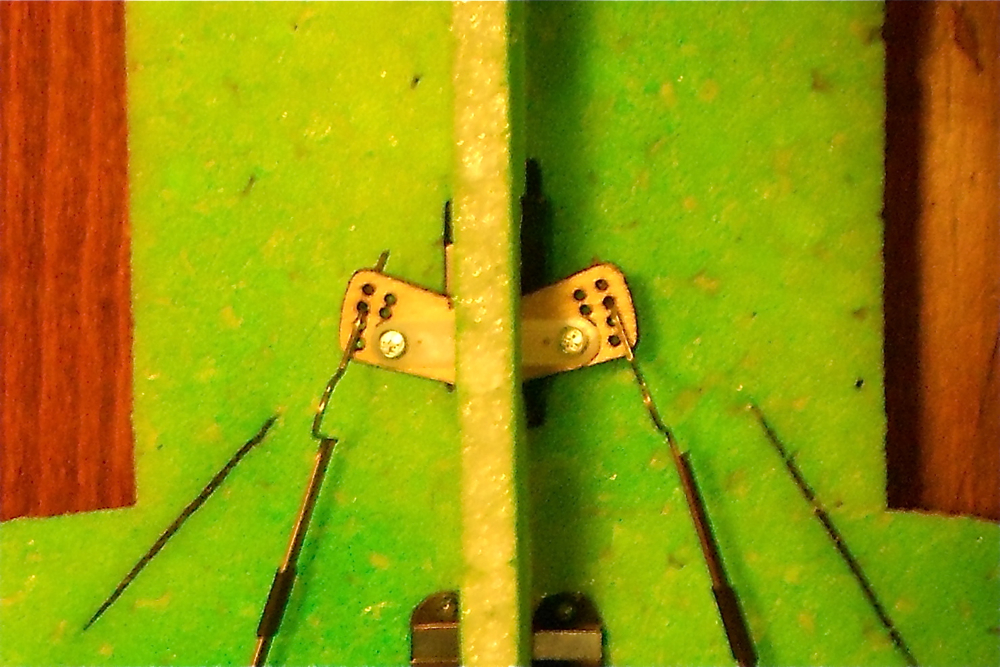 Install the pushrods into the
aileron horns and then with the bellcrank loose, insert the adjustable ends
into the outer hole, second from the front lobes. Pop the bellcrank back onto
the servo and center it and adjust the ailerons so they are level. The
rods/z-bends will slip under the heat shrink tubing to allow this adjustment
but also hold it in place for gluing. With paper towel or plastic under the
pushrods to avoid marring the paint, glue the wires to the carbon fiber rods
with CA to hold this position.
Install the pushrods into the
aileron horns and then with the bellcrank loose, insert the adjustable ends
into the outer hole, second from the front lobes. Pop the bellcrank back onto
the servo and center it and adjust the ailerons so they are level. The
rods/z-bends will slip under the heat shrink tubing to allow this adjustment
but also hold it in place for gluing. With paper towel or plastic under the
pushrods to avoid marring the paint, glue the wires to the carbon fiber rods
with CA to hold this position.
6.
 Following this same procedure,
create the longer tail pushrods using the remaining pieces. Be sure to put the
pushrod standoffs on the rods before you create the second end.
Following this same procedure,
create the longer tail pushrods using the remaining pieces. Be sure to put the
pushrod standoffs on the rods before you create the second end.
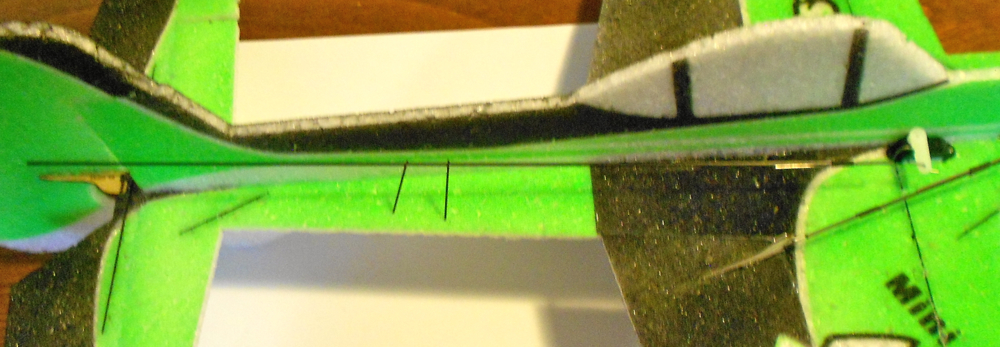
7.
When
the tail pushrods are completed and installed, poke and glue (Foam-Tac) the
standoffs into the foam at 1/3rd distances from the ends. Adjust the
depth of the standoffs to hold the pushrods as straight as possible from end to
end.
8.
With
your servos plugged into the Rx, center your servos as best you can, removing
and centering the arms to the closest spline. Adjust the final centering with
the subtrim for each channel so you have perpendicular arms and full trim
available. Now use the servo arm screws and lock the arms in place on the
servos.